If you have a limited internet plan, spending data on unnecessary updates can cost you a lot. However, the good thing is that both Windows 10 and Windows 11 offer you a feature to deal with limited internet data. You can easily set up Metered Connection on Windows 11 to limit the amount of data that Windows uses. Using a Metered connect allows you to limit your data usage. Once the data usage touches the data limit, the internet connection is stopped automatically. On Windows 11, the WiFi and Ethernet Connections are not set as metered by default. So, you will need to turn on the Metered connection for both connections manually. Also read: How to Download Windows 11 ISO Files Without Media Creation Tool
Steps to Set Up a Metered Connection in Windows 11
So, if you want to set up Metered connection in Windows 11, you are reading the right guide. In this article, we will share a step-by-step guide on how to set up Metered connection on Windows 11. Let’s check out.
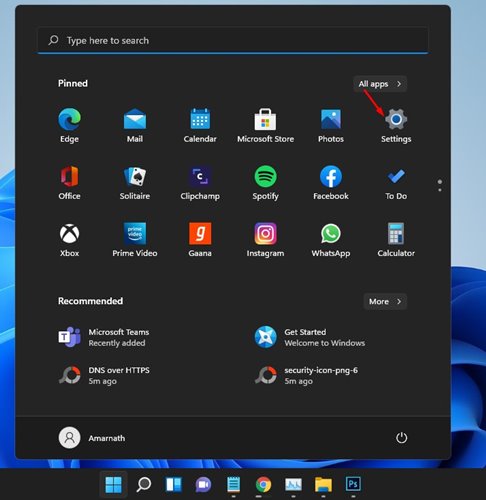
First of all, click on the Windows 11 Start Menu and select Settings.
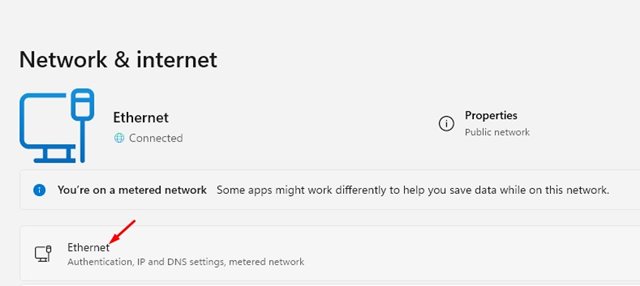
Now, on the Network & Internet, select from WiFi or Ethernet depending on what you are using. Here I have selected Ethernet.
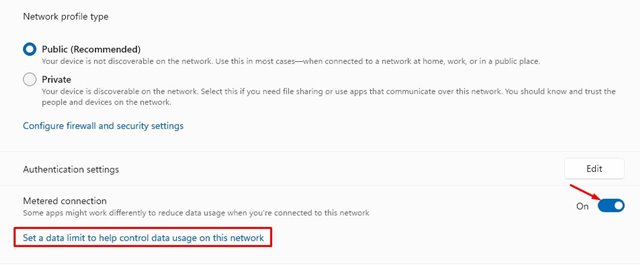
3. On the next screen, enable the toggle button behind Metered Connection.
Next, click on the Set a data limit to help control data usage on this network link, as shown in the screenshot below.
On the next screen, click on the Enter limit button, as shown in the screenshot below.
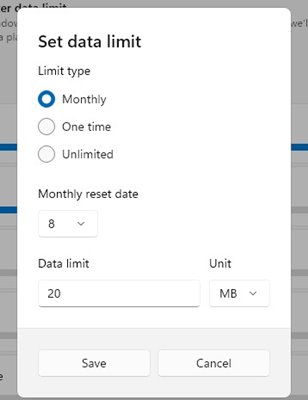
On the next screen, select the data limit type to use for the metered connection. Select your limit type from Monthly, One time, Unlimited. Next, set the reset date and the Data Limit in GB.
That’s it! You are done. If you wish to remove the data limit, head to the same page and click on the Remove Limit button, as shown in the screenshot below.
So, this guide is all about how to set up a metered connection in Windows 11. I hope this article helped you! Please share it with your friends also. If you have any doubts related to this, let us know in the comment box below.
Δ
