If you are using Windows 11, you get a Find My Device option on the Settings app that helps users locate their lost Windows devices. This is a great feature, but it’s not 100% accurate and has its flaws. First, the Find My Device option needs to be enabled manually on a Windows device, requiring an active Microsoft Account. Without linking to Microsoft Account, you can locate your lost Windows device. Second, the feature needs to be enabled all the time for location tracking. If you are not using any Microsoft services, the location tracking will not be very accurate.
Steps to Enable & Use Find My Device in Windows 11
Anyway, if you are interested in enabling or disabling the Find My Device option in Windows 11, you are reading the right guide. In this article, we will share a step-by-step guide on how to enable & use the Find My Device feature in Windows 11. Let’s check out.
Enable Find My Device on Windows 11
In this section, we have listed some simple steps that will let you enable the Find my Device feature on Windows 11. Here’s what you need to do.
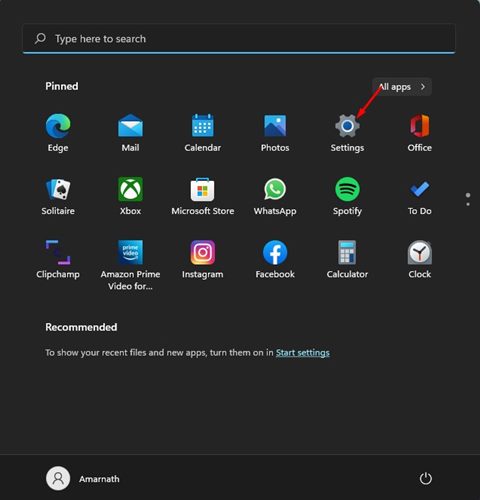
First of all, click on the Windows 11 Start menu and select Settings.
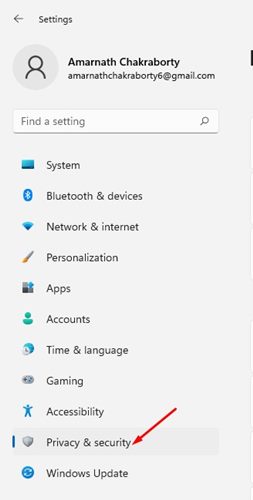
On the Settings page, click on the Privacy & security option as shown below.
On the right pane, click on the Find My Device section.
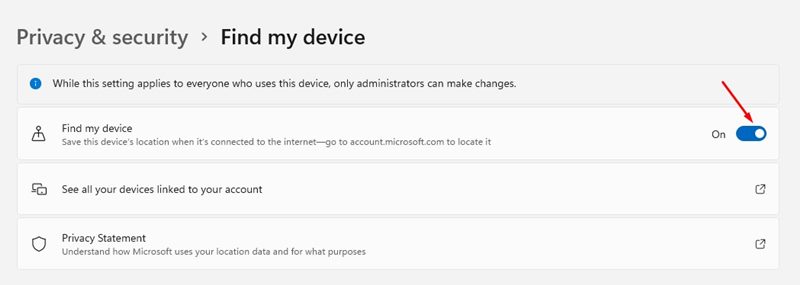
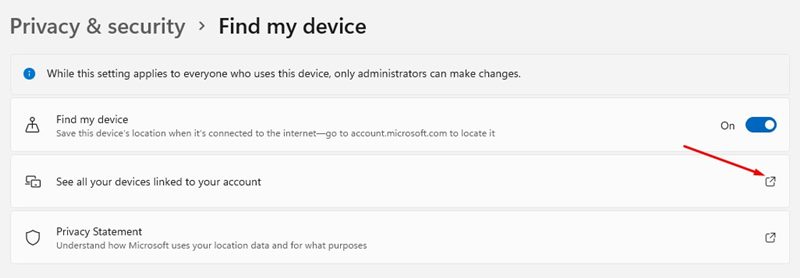
On the next page, enable the toggle for Find my device. This will enable the find my device feature on your Windows 11.
Please note Microsoft tracks your current location by taking lots of things into account like GPS, nearby WiFi hotspot, IP Address, Cell towers, and more.
How to Locate Lost Windows 11 Device?
Once you have enabled the Find my Device feature, you need to check whether the feature is working or not. To confirm, follow some of the simple steps below.
First of all, click on the Windows 11 Start menu and select Settings.
On the Settings page, click on the Privacy & security option as shown below.
On the right pane, click on the Find My Device section.
On the next screen, click on the See all your devices linked to your account option.
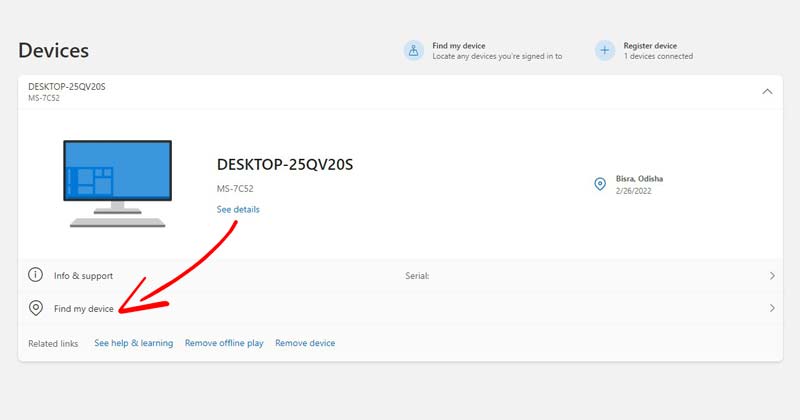
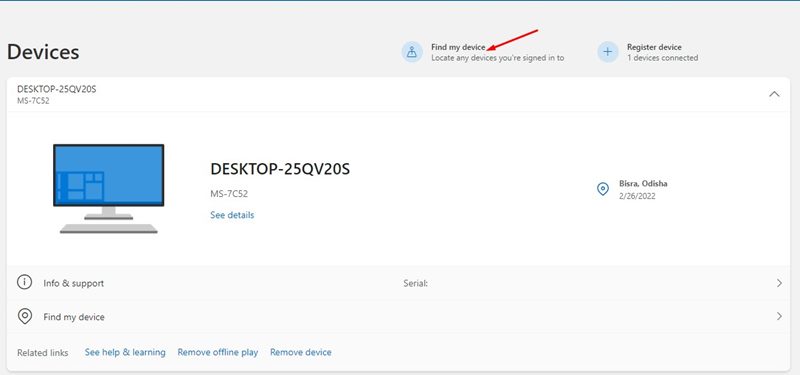
You will be redirected to the Microsoft Account page. You will see your Windows device on the Devices list. Simply click on the Find my device option as shown below.
Now, Windows 11 will open a map and will list the last location of your Windows Device.
If you want to find your device, you need to click on the Find button.
That’s it! You are done. This is how you can locate your misplaced laptop with Find my Device on Windows 11.
How to Disable the Find My Device on Windows 11?
If you don’t want Microsoft to track your laptop, you can disable the Find my Device option. Disabling find my device on Windows 11 is pretty easy; just follow the steps we have shared.
First of all, click on the Windows 11 Start menu and select Settings.
On the Settings page, click on the Privacy & security option as shown below.
On the right pane, click on the Find My Device section.
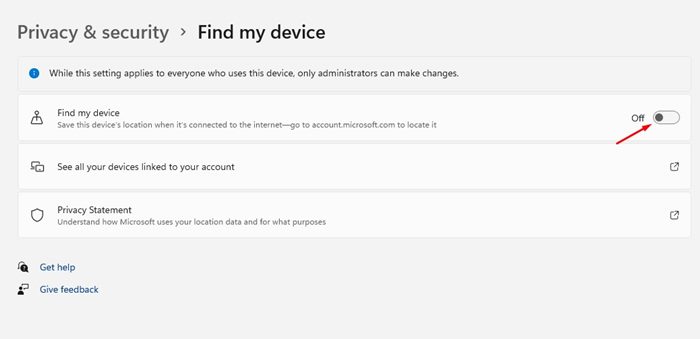
Turn off the toggle for Find My Device on the next screen.
That’s it! You are done. This will disable the Find my Device feature on your Windows 11 laptop/PC. Find my Device in Windows 11 is a great feature, but it’s not 100% accurate. For better security, it’s best to consider third-party premium location tracking services. I hope this article helped you! Please share it with your friends also. If you have any doubts related to this, let us know in the comment box below.
Δ
