Generally, the higher the refresh rate, the better the viewing experience. However, this also comes with a disadvantage – higher refresh rates also use more power, causing battery drain issues. Windows 10 allows users to change the display refresh rates in easy ways, but Windows 11 includes a new & unique feature that changes the way we adjust and experience the display frame rates. Microsoft introduced a new feature to Windows 11 known as Dynamic Refresh Rate. It’s a feature that dynamically sets your device’s refresh rate based on what you are doing. In other words, it automatically switches the refresh rate to balance your PC’s power consumption & performance.
Dynamic Refresh Rate Compatibility
Well, the Dynamic Refresh rate can only be enabled on a laptop or monitor that supports a refresh rate of at least 120Hz. Also, the laptop/monitor should support VRR (Variable Refresh Rate). Along with it, the Dynamic Refresh rate also requires a WDDM 3.0 graphics driver. The graphics driver can be installed directly through the Windows 11 updates. If you don’t know about your display driver specs, run the DirectX Diagnostic Tool. Furthermore, you should note that the Dynamic Refresh Rate option is only available on the very latest version of Windows 11. So, even if you have compatible hardware, you will still need to update your PC to take enable & use the new feature.
Steps to Enable Dynamic Refresh Rate (DRR) on Windows 11 PC
So, if you are interested in enabling the dynamic refresh rate in Windows 11, you are reading the right guide. In this article, we will share a step-by-step guide on how to enable Dynamic Refresh Rate (DRR) on Windows 11. Let’s check out.
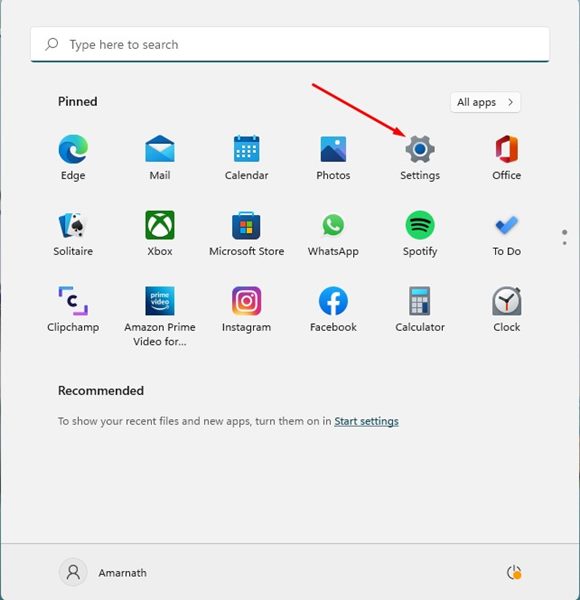
First of all, click on the Windows 11 Start button and select Settings.
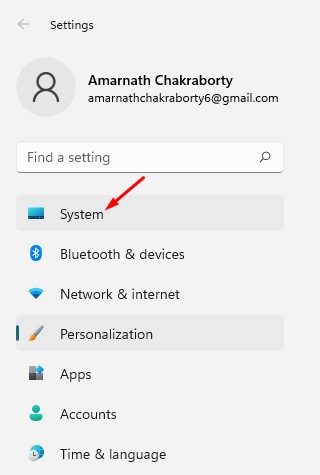
On the Settings app, click on the System option on the left sidebar.
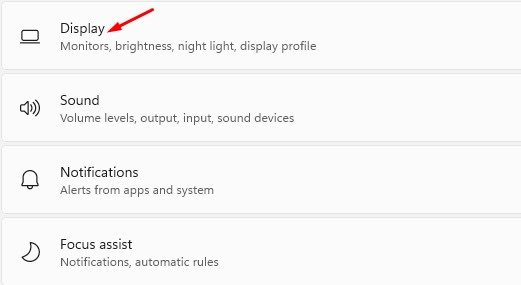
On the right pane, click on the Display tab as shown in the screenshot below.
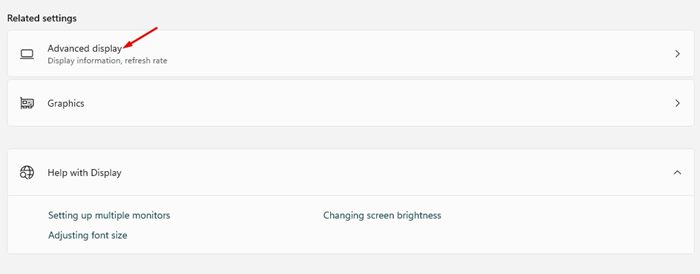
Now scroll down and find the Related Settings section. Next, click on the Advanced Display option.
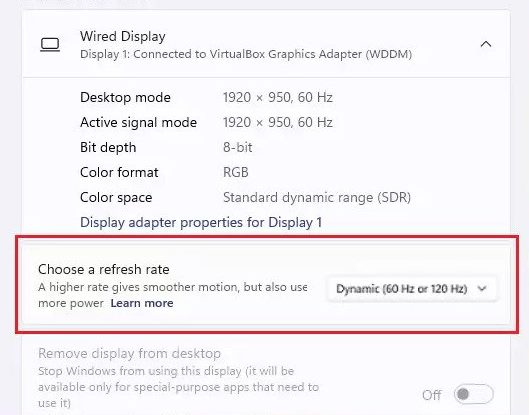
On the Advanced Display page, use the Choose a refresh rate option and select the ‘Dynamic’ option to enable the DRR feature.
That’s it! You are done. This will enable the dynamic refresh rate on your compatible Windows 11 computer. If you are unable to find the Dynamic option, you have incompatible hardware. If you wish to disable the Dynamic Refresh rate, you need to navigate to the Settings > System > Display > Advanced Display. On the Advanced display page, choose a regular refresh rate such as 60Hz or 120hz. Dynamic Refresh Rate is mainly designed for laptops as it helps to preserve battery life. However, if you are experiencing display issues after enabling the feature, you need to disable it. I hope this article helped you! Please share it with your friends also. If you have any doubts related to this, let us know in the comment box below.
Δ