You need to execute a few commands to add or delete users in Ubuntu servers. If you know the commands, things can become easy for you. Below, we have shared a step-by-step guide on how to add or delete users in the Ubuntu server. Make sure to follow the steps carefully to avoid any problems. Let’s get started.
Steps to Add Users to Ubuntu Server
By default, if you create a new server on your Linux, you are only given the ‘root’ account. Still, if you want to add some more users, you can sign into that root account and then type the command: “add user new user”. Note that you can rewrite the command with your desired username in place of new user in the command.
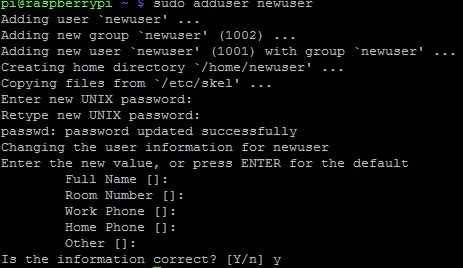
If you have been signed in as a non-root user and have gained the studio privileges, you need to use a different command, i.e., “sudo adduser newuser“. Like the previous command, you can rewrite the command with your desired username instead of newuser.
After you type and enter these commands in your Ubuntu, you will be asked a series of questions that will include the following:
Assign and confirm password for the new user (You will have to fill that in) Addition information will be asked of the new user that would help you in time of emergency etc. You will be asked to confirm the whole provided information as true. To do that, you must type “Y” and then continue.
Steps For Deleting User
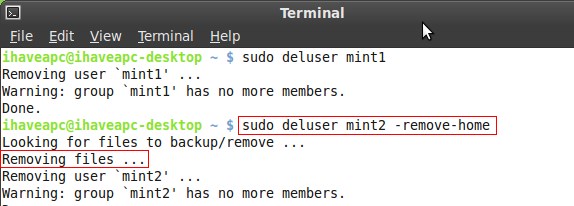
After adding a user, if you wish to delete a user, you need to follow these steps. Here’s how to delete users in Ubuntu Server.
- First, you must sign in as ‘root’ and type the command: “deluser newuser“. There should be the name of the user in place of newuser.
- If you want to delete the user using the non-root user access, you need to use this command: “sudo deluser newuser“. Like the previous command, you need to rewrite the command with your desired username instead of newuser.
These are the steps to add or delete users in the Ubuntu server. If you need more help managing users on a Ubuntu server, let us know in the comments below.


