The feature is handy, and you can create endless sets of restore points on your system. If you use Windows 11 beta or dev builds, you might want to create restore points regularly. Although Microsoft allows you to create System restore points in Windows 11 in easy steps, wouldn’t it be easier if we had an option to create Restore Point in the context menu? Yes, if you want to make it easier to create a system restore point in Windows 11, you can choose to add a ‘Create System Restore’ option in the context menu.
Steps to Add ‘Create System Restore Point’ Option in the Context Menu
Hence, if you are looking for ways to add the ‘Create System Restore Point’ option in Windows 11’s context menu, you are reading the right guide. In this article, we will share a step-by-step guide on adding a create system restore point option in the right-click menu of Windows 11.
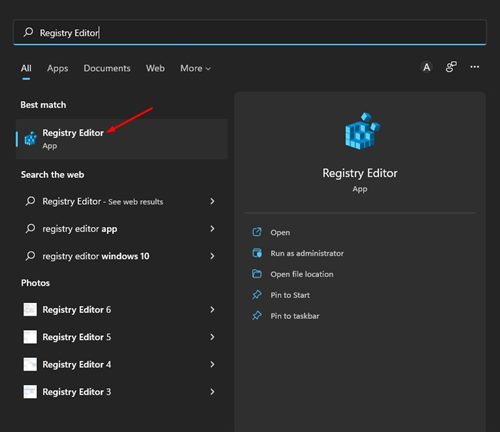
First of all, click on the Windows 11 search and type in Registry. Next, click on the Registry Editor app.
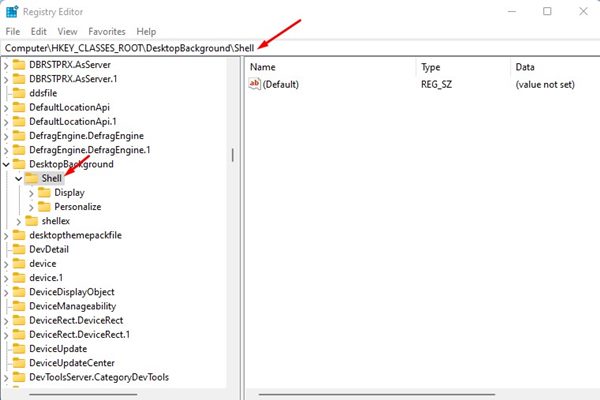
On the Registry Editor, navigate to the following path: HKEY_CLASSES_ROOT\DesktopBackground\Shell
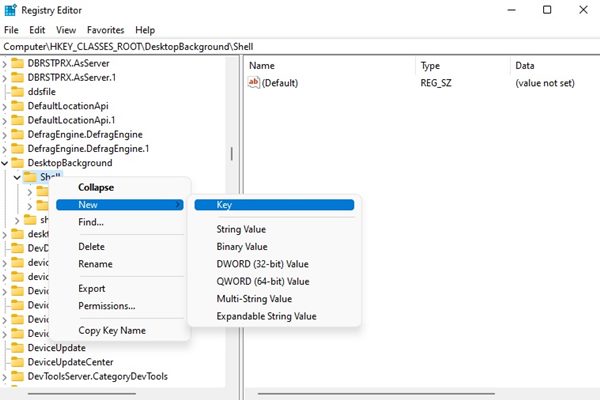
You can also copy and paste the path on the Address bar, as shown below. 3. Now right click on the Shell folder and select New > Key.
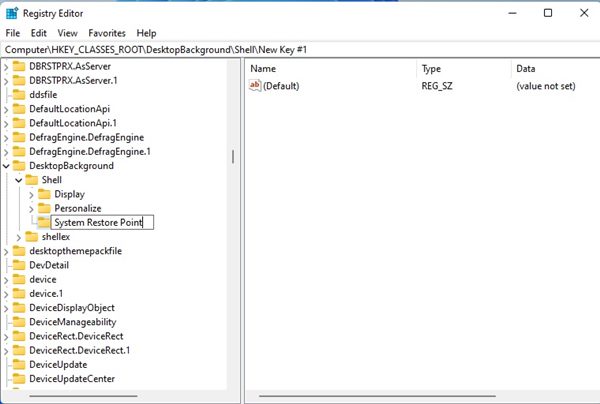
Name the new key System Restore Point.
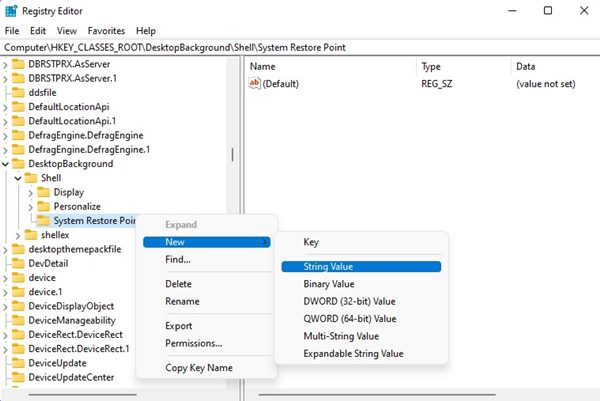
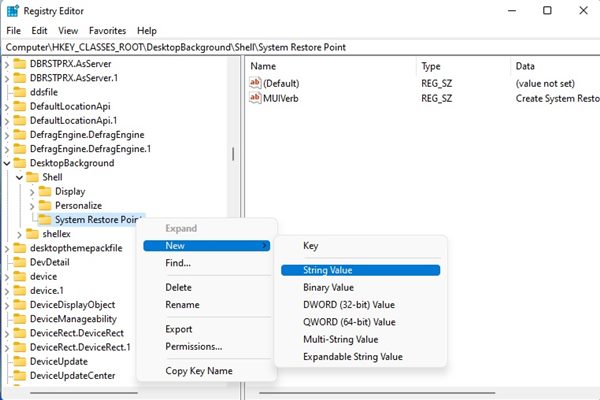
Now, right-click on the System Restore Point key and select New > String Value.
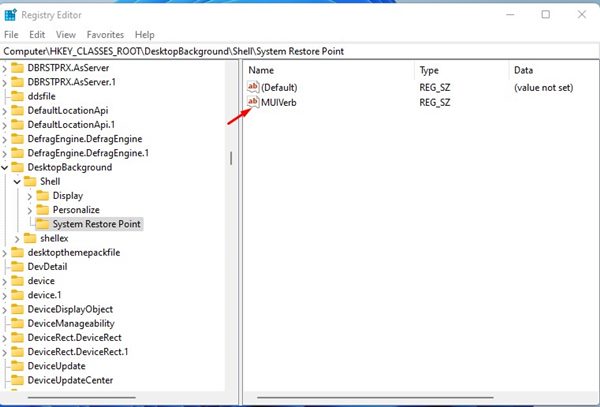
Name the new String Value MUIVerb.
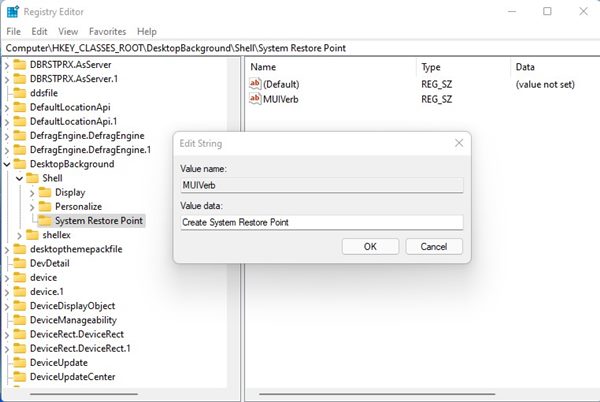
On the right pane, right-click on the MUIVerb String Value and select Modify. Next, on the Value data field, enter Create System Restore Point and click on the Ok button.
Next, right-click on the System Restore Point key again and select New > String Value.
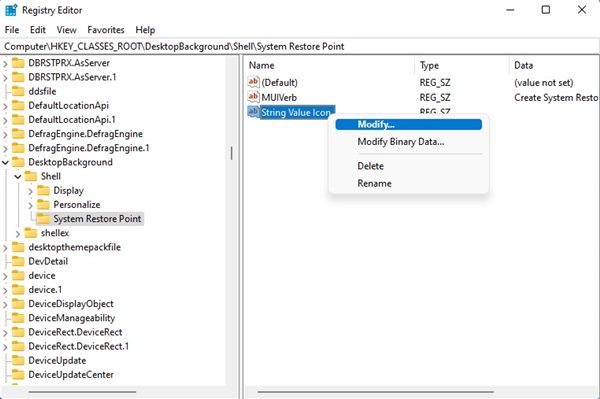
Name the new String Value Icon. Now, right-click on the Icon and select the Modify option.
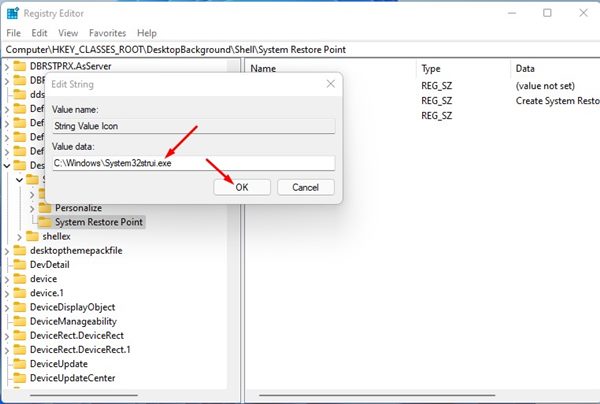
On the Value data field, enter the following text and click on the Ok button. C:\Windows\System32strui.exe
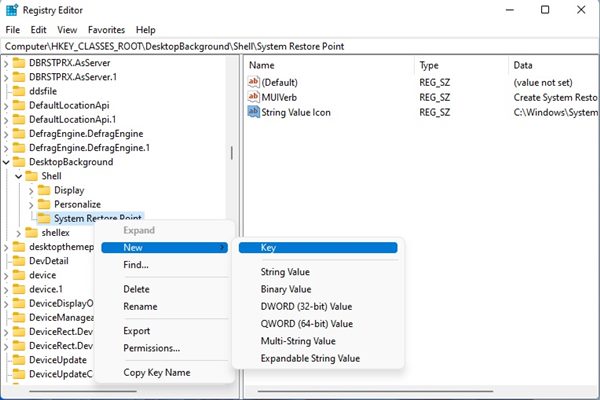
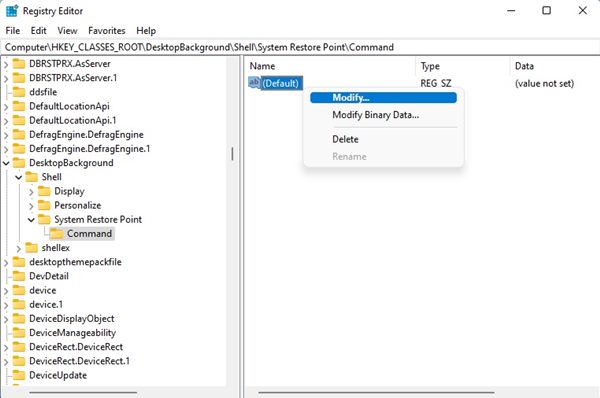
Now right click on the System Restore Point key once again and select New > Key.
Name the new key Command. Once done, right-click on the Default string value on the right pane and select Modify.
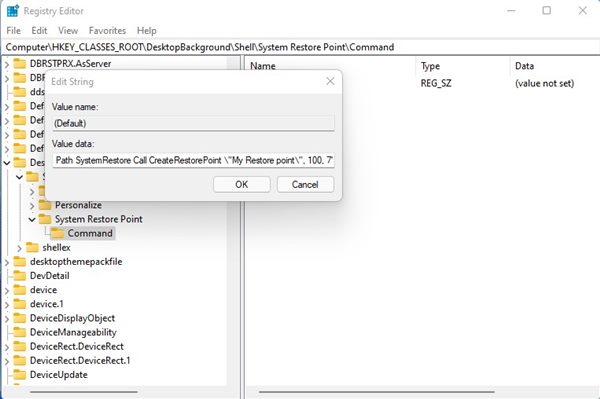
Next, on the Value Data field, enter the text below and click on the Ok button. powershell.exe -c start -verb runas cmd ‘/k wmic.exe /Namespace:\oot\default Path SystemRestore Call CreateRestorePoint "My Restore point", 100, 7’
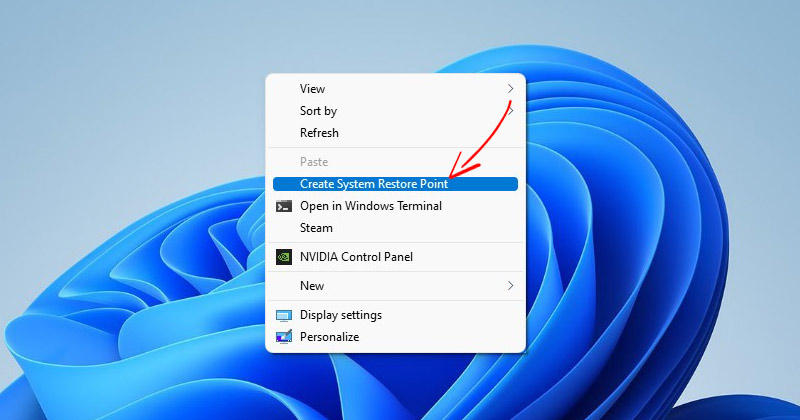
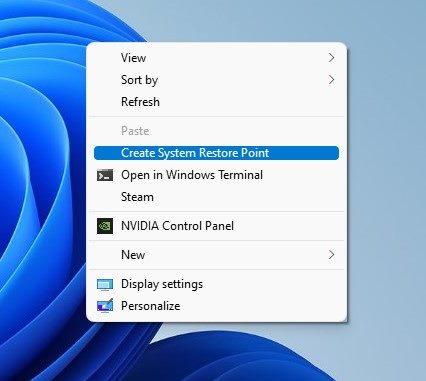
That’s it! You are done. Now, right-click anywhere on a blank space on your desktop. You will find a new Create System Restore Point option.
This is a pretty lengthy process, but it does work. Make sure to follow the steps carefully, or else the Create System Restore Point option in the context menu won’t work. I hope this article helped you! Please share it with your friends also. If you have any doubts related to this, let us know in the comment box below.
Δ